DESIGN  |  ILLUSTRATION  |  ANIMATION  |  WRITING  |  FILMMAKING  |  MUSIC  |  GAMES
Showing posts with label art. Show all posts

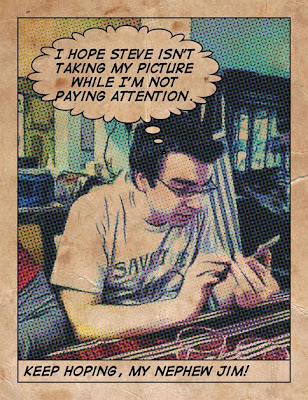
Create a Vintage Comic Look with ToonPAINT and Halftone for the iPhone


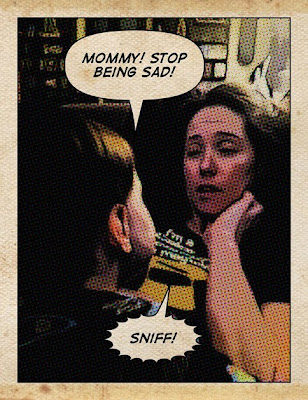
A vintage style comic panel created with ToonPAINT and Halftone.

I came across a cool one-two punch this week - a dynamic duo of iPhone apps that, when used together, create a neat vintage comic book/strip effect for photos.

The first app in this combo is ToonPAINT ($1.99 from Toon-FX). ToonPAINT lets you first convert your iPhone photos to black and white linework (with the option of a gray mid-tone) which you can then hand-paint directly on your iPhone screen.
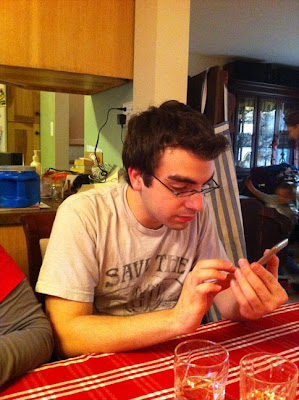

The original image.

Once you Load the image from your Gallery (you can also shoot directly from your Camera, if you choose), the image takes a few seconds to process as Inklines. The Shading controls in ToonPAINT's Inklines stage allow you to control the amount of black and gray areas in your image, as well as the amount of edges shown. You can also use the app's Size options to fine tune the Coherence, Edge Width and Edge Length.

I've found that the size of the subject in an image will determine what works best for these options - a closeup of a face, for example, might work better with wider edges, while a full body in an image can benefit from the XS settings in Coherence and Edge width. Play around with the options until you're happy with the look of your Inklines. You can also use the Pan/Zoom feature to zoom in and get a detailed look at your linework and tone.
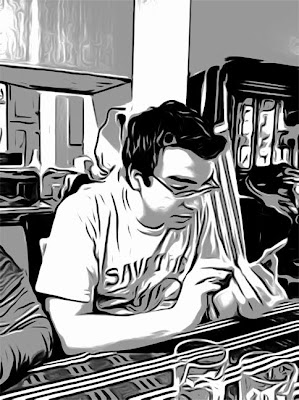

Inklines from ToonPAINT.

Next, move onto ToonPaint's Paint stage. There's a slider to adjust your brush (or eraser) size, and a palette with a selection of eight colors. Once you select a color, you use your finger to paint over the Inklines. You can also use the Color Picker to modify the colors in your palette, and there's a a Pan/Zoom feature in this stage as well.

However, for my experiments in getting a vintage comic book look, I've bought an additional feature - Auto Color. It's a $.99 in-app purchase, and you buy it by clicking on the icon above the palette of the lovely lady, in color, with the flowing blonde hair. By using this tool, color from the original photo is automatically added back into the image, though in a limited range, giving the image a posterized style which works really well for what I'm trying to achieve.

You can still paint on top of the colorized image, with the hand-painted colors completely replacing the original colors - and, interestingly, if you use the eraser too after Auto Coloring your image, it only erases the hand-painted color - the original color remains, which can be helpful if you want to take your time modifying one specific object in the image.


The colored image from ToonPAINT - fully colored using the application's Auto Color feature.

I've found that high-contrast images with strong lighting yield the best results - no surprise, but getting the lighting right helps ToonPAINT handle the outlines and gray tone in a more naturally comic book-like way. If your outlines aren't bold enough, your final image will look less like a printed comic and more like a printed photograph (which Halftone alone can generate just fine on its own).

Once you're happy with your colors, click Done and you'll get to the Save/Share screen. Make sure to turn on the High-res Output option (hopefully whichever camera you've taken your original image with was also set to its maximum resolution) and then Save to your Photo Gallery.

Next, fire up Halfttone ($.99 from Juicy Bits) and click the camera icon at the lower left, then Choose from Album and browse to the image you just created with ToonPAINT. Halftone will generate a dot pattern within the image, and will also add a background texture and border - both settings which you can modify later.
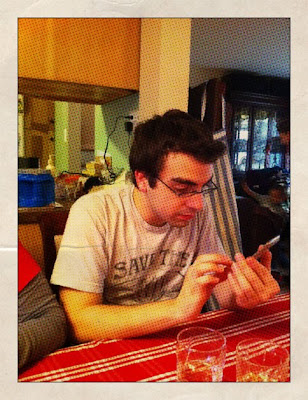

For the sake of comparison, this is what the original image looks like when processed directly with Halftone and not using ToonPAINT first. Not very comic-y.

When your image has finished processing, click on the gear icon in the upper left. First, make sure Full Size is set to On, so you can preserve your image at the highest resolution possible. You can then experiment with the Blend Original and Process Original features, as well as the Dot Size (the primary setting you'll want to play around with) and Dot Strength (I've always kept mine at 100% - the default).

Click Done for now (you can always go back and modify those settings later), and click the Paper icon. You can pick from 20 different gnarly backgrounds that your image "prints" onto, as well as a plain white background (more on that option later) for a clean effect. Next, click the Layout icon, which lets you select from nine pre-existing panel layouts, varying the number and position of two different styles of captions. There's even a completely captionless, borderless effect.

You can then click on the Word Bubble icon to add up to five word bubbles. Click and drag the bubbles to reposition; click and drag the tip of the tail to change its length and direction (a particularly impressive detail); and click within the bubble to modify the text, style (traditional oval, "flatter" oval, rectangle, rectangle with rounded corners, exclamatory "pointy" bubble and thought bubble), and z-position (which bubble is on top of which other bubble, if they overlap within the layout). You can also delete the bubble you're currently editing from here. Click Done when you're finished, and the bubbles will auto-size very nicely to the amount of text you've added.

Back in Halftone's main screen, you can keep adjusting the elements in your layout. Though you can't reposition the captions, you can click within them to edit your text (you'll have to change the layout to delete them completely). There's also Font option that lets you adjust the global typeface selection and size (you choose from Small, Medium, and Large options).
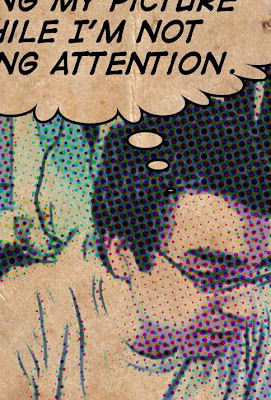

Detail of the final image. Dig those funky wrinkles!

Again, fine tune the look of your piece until you've got things looking the way you want them, then click on the icon in the upper right of the main screen and Save to Album. Since Halftone doesn't have a Pan/Zoom feature, I recommend opening the saved image from your Photos app and zooming and and around to make sure the results look the way you want them to.

I loved the effect I got when I first combined these two apps - it reminded me of the independent sci-fi comics I read in the late 80's/early 90's, when comic production techniques and paper quality started to improve. The Pacific Comics (and later, Eclipse Comics) anthology series Alien Worlds came to mind - many of those stories featured art with strong linework and thick blacks, colored with the kind of fluidity that mainstream comics usually couldn't achieve when printing on the typical nasty newsprint that I don't remember seeing much past the 80's.

Using this technique, it's easy to imagine creating a full-size, printable comic by exporting the full-size final images, then composing the page layouts in a full (not iPhone/iPad) version of Photoshop (or InDesign, or Illustrator, or your preferred page layout program - preferably with adjustable guides so you're not laying things out by eye). The default panel dimensions are a bit wide for the traditional 6x9" comic book page 9x9 panel layout, but they fit almost perfectly on a US Letter-sized page, as long as you overlap the borders. Since it would look odd to see the same exact page texture repeated nine times on a comic page, you could select the plain white background in Halftone before saving your images, and if you still wanted that aged effect on your page, you could put together your panel layout in Photoshop, create or buy your own background textures, then set them up as Multiply layers in Photoshop so that they cover your full page.
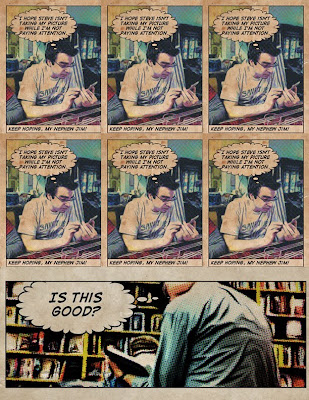

Letter-sized comic book page using two images. The paper texture repeats (though this can be dealt with), and the large panel is out of proportion.

I confess that I've also tried using Adobe Photoshop Express between the ToonPAINT and Halftone steps, to adjust the Exposure, Contrast and Saturation settings of the image created by ToonPAINT. This is helpful in general, in achieving a certain look (adjusting the Contrast of an image so blacks become dark grays, which really gives the panel an aged look) - and may be necessary if you're putting together a number of panels into a single comic strip or page, and want them to all look consistent.

And speaking of Photoshop Express, what if you don't want a static nine panel layout for your comic book page? Maybe you want a panel that stretches across the width of the page? Well... I don't see it happening. Yes, you can use Photoshop Express to crop the original image (or the ToonPAINT version), but when you take it into Halftone, all of the elements - background texture (if you use it) panel and word bubble border, text and dot pattern size - will be out of proportion, because you'll have to enlarge the final image to make it fit into the layout. Sure, you could shrink the Font and Dot Size in the outsized panels to try to match the look of the other panels, but that's going to take some work - and you can't enter those values numerically, so you'll be winging it every time you perform that task. And you'll have to visually eye-up the size you're cropping to every time. And if you were thinking of stitching two panels together side-by-side, you'll have to deal with manually matching up the dot patterns in each image. I'd have to say a versatile comic page layout is beyond what these two apps can comfortably do at this point - and that's fine.

Out of the box, ToonPAINT and Halftone are a great way to use your iPhone to create images that seem ripped from an old, printed comic page - all for under $5. I'm planning on putting together a short comic book story (and if my son were a little older and more cooperative, I probably would have at least one page finished at this point), so expect a trial run sometime in the near future.
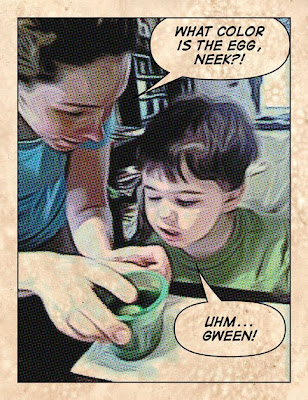

An image created with the Edges setting in ToonPAINT set very high - this gives the image a more painted feel.
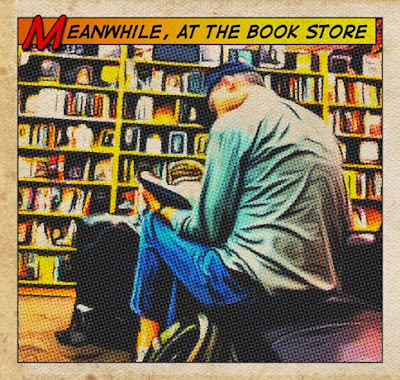

The boldness of the linework on this image, combined with the high contrast in the original photo, give the final panel a strong comic book look.

The different page textures in Halftone can make the image look like it was printed on aged newsprint, cardboard, and other wrinkled, ripped, and otherwise-distressed materials.

Skinny Sneakers


Skinny sneakers sketch. Click for larger version
(they don't get any less skinny, though).


It's rare that I just sketch for sketching's sake these days - the closest I come to doing that is doodling while I'm on the phone, which sometimes yields some good results - only sometimes, though. But most of the time I'm sketching these days, I'm doing it for a project - roughing out ideas and getting layouts into shape. That's kind of a shame, but it's the result of being busy with client work, which is nothing to complain about.

The skinny sneakers piece was done when my band Restraining Order was in the studio in 2003, recording our five song E.P. Five on Blue. We spent a lot of long Saturdays in that studio, and once the basic tracks (drums, bass and a guide guitar) were recorded, it tends to then become only one band member at a time doing the recording - which leaves the rest of us plenty of down time in the control room.


Closeup. Isn't messy linework nifty?

We try to make that down time useful - tracking changes we've made or need to make to the songs, working on the track order, liner notes and other information for the CD packaging - but all of that doesn't take very long, and we wind up just b.s.ing and eating pizza for hours on end. Bands like pizza.

Somewhere in the midst of that down time, I grabbed my pen and paper and started sketching my bandmate Phil's Converse-covered feet. I'm not usually good with sketchbooks - I feel too much pressure to fill them with only great drawings - I'm way too conscious when I start working a sketchbook (especially if it's bound, and the pages can't be removed without ripping them out, leaving a noticeable torn edge - I hate that) but here it worked out pretty well. I was in a Zen state of relaxation, and the drawing came out nicely, I think.

Eventually, when I started mining my past work for use on my Print On-Demand stores, I found this piece and wondered if it would work on any product. It's more arty and less designy than most of my other pieces, and there's no real theme or clever double-meaning - but I still used it, adding it to (among other products) a greeting card design. The inside of the card says, "What's swingin'?" - because that one foot is swinging, you see.

I've sold a couple so far - probably from fans of Converse, or maybe sneakers in general. I've always seen sneaker loyalists as the biggest untapped resource in this country, and now it's proving to be true. I win.


Skinny Sneakers greeting card on Zazzle

Croc and Boy Sketch


A crocodile and a little boy. Will this become the Calvin and Hobbes
ripoff I always knew I had in me? I do not even know myself.


Just a little sketch today - a lite snack for a Friday morning.


Pencil sketch detail, slightly cleaned up in
Photoshop. This guy needs a name. Any suggestions?


I have no idea what this is about - I just did the sketch with no pre-planning ("pre-planning" seems redundant, doesn't it?) I really liked their proportions, though - maybe I'll ink them up and work them into a little strip. It could be my Calvin and Hobbes - or maybe something more like Copper, which I love a lot, too. And then I'll submit it to Universal Features Syndicate. Not really. I'd just post it here.

Love Is In The Air - Part Two


Click image for larger version. You can even see a fancy animation
showing the sketch fading into the final image!


I've finished my wedding invitation piece, and the client was delighted with it, as was her fiance. I was a little worried that the fanciful color scheme - especially the trees - would cause her concern, but she really liked the effect. The only revision she requested (actually, it came from her fiance) was that the flowers get more definition - the original version of the bouquet was more amorphous, but in the final version I defined the shapes as roses.

In my first pass vectorizing the piece (using the long-defunct but much-loved Freehand and my trusty Wacom tablet), some of the pieces in the front - the stone pilings and stand for the sculpture - were gray, and the ground was kind of a concrete color (which is what it really looks like - see comparison below) but those literal colors were boring and didn't convey the kind of romantic, whimsical feel my client was going for - so I deviated.

I kept a jazzy, loose feel to the structures - it didn't make sense to create totally perfect perspective and angles for a piece like this. I think that kind of treatment would have come off as looking too technical and less artistic. Elements were simplified into mostly monochromatic versions of their real-world counterparts. I also reduced the width of the water so it could fit completely into my piece - I didn't want anything to overshadow the couple. I considered adding the fountain's spume, but it was another element that might have competed with the bride and groom - and I really needed the sky color to provide contrast behind the bridal gown - a light or white fountain shooting up there would have been a problem.

My only regret is, because of the bride's dress and the shape of the letter, the L is pretty heavily obscured. I couldn't find a way out of that one, so I've got assume that the ubiquity of the landmark, combined with the fact that people know how to spell the word "love", will help the viewer's mind complete the image.

And here's a comparison - my version versus reality. I've already designed the invitations and RSVP cards, using a couple different croppings of the piece. Maybe I'll even get invited - if not, hey - I'll just print an extra invitation. Don't tell.


Inspiration Source: Jon Gnagy Learn to Draw Kit


Yesterday, illustrator Mark Zingarelli posted a few photos and memories on Facebook about Jon Gnagy, and his famous (to me, anyway) "Learn to Draw Kit". Now, I'm one of those people who's saved as much as possible from childhood, but even though I was a proud owner of The Kit from a young age, I can't remember having it in my possession past my early twenties. I'd nearly forgotten it - or at least, I haven't thought about it in many years, and that's a shame because it really was a big part of my youthful desire to be an artist.

My grandfather gave me the Learn to Draw Kit sometime in the mid-70's, when I was around five or six. He was an artist (and a barber, and an amateur inventor), and as the only real-life artist I knew at that age, he was my idol. My grandparents lived with us, so there was rarely I day when I wouldn't run downstairs and beg my grandfather to draw and paint for me. Usually I'd succeed - I was a pretty cute kid, plus I threw a mean temper tantrum when I didn't get my way. Having been formally trained as an artist, I'm sure my grandfather wasn't enthralled at the prospect of recreating a certain Spider-Man image from one of my comics, for example - but, following the rule of grandparents spoiling their grandchildren, he gave in every time.

My memories of the actual kit (which contained drawing tools plus a lesson book) are a little vague, though the more I read and see about Jon Gnagy now, the more memories come flooding back. I do remember his lesson on drawing the core shapes (shown on the kit's box cover - cone, sphere, cube and cylinder) and how he claimed they were the foundation for all real-world objects, though I think I doubted this fact - or, at least, sought out exceptions ("What about The Blob, Jon, huh?! Didn't think of that one, did you?!")


The Jon Gnagy Learn to Draw Kit, in one of its many incarnations.

I don't think I actually gave much of a shot to the lessons themselves - I enjoyed reading the book and experimenting with the pencils, charcoals, erasers and blending stumps (what a term) on my own, but from what I recall I was too stubborn to go through Jon's step-by-step process to create a scene. I was probably too easily discouraged when my pieces didn't turn out exactly like the final results in the book. I remember the writing having a simple, straightforward style that I liked. Jon's targeted audience was broad - he wasn't aiming at artists, or even just people who'd considered being an artist. Jon seemed to be reaching out to people who simply believed, "I can't draw", giving them the opportunity to push themselves and to enjoy the activity of art.

And this open attitude comes across in all his television art lessons. You know, it probably said something about Jon having a TV show on the box, but I was oblivious to that fact until yesterday. Silly me. That's how his drawing kit became so popular - it was an offshoot of his successful show. Since the show began in the 50's (and was shot in black and white), I doubt it aired much when I was a kid in the 70's, but it's great to be able to check it out now. I can easily see the appeal - Jon's voice was not what I imagined; he was casual and yet authoritative. I should have expected as much, based on the stylish portrait of Jon that adorned the kit's cover:


Gnagy the badass.

Now that I have more perspective on the man, he seems like the Jack London of art teachers. I wish I could have watched Jon's show back when I was starting to draw - besides the benefit of the actual lessons, it would have been nice just to see and hear this guy who was a working artist. Hmmm... I wonder if that would have conflicted with my image of my grandfather - maybe I'd have invited Jon over and had them both battle on paper in an intense "draw-out". Or maybe they'd have just punched each other around a little.

Check out Jon's Seaport Village lesson.

And apparently the kits are still being produced - a full sixty years after their inception. What a testament to the man. Looks like it's time for me to take another trip down childhood memory lane via eBay. With that and the lessons on YouTube, I'll be set.

Ace Frehley and Peter Criss Crayon Drawings


I did these two crayon sketches for my great nephew Julian, age six, who asks (or sometimes demands) that I draw for him every time I see him. I'm a Kiss fan, he doesn't even know who they are, but I'm pretty sure it doesn't matter. A drawing is a drawing when you're six.

I rarely have the opportunity to sketch with a pencil first when I'm drawing for Julian, and I don't usually do well drawing in pen, marker or crayon without some kind of guide, but I was happy with the way these came out - probably because the faces of the four original members of Kiss are burned into my brain so I didn't actually have to think too much. I guess that's why I wound up stealing these back from Julian. Don't tell.

These were draw with a dark colored crayon, but when I scanned them I altered the colors to Ace and Peter's "theme colors". Yes, members of Kiss have theme colors. That's one of the many things that makes them cool.

Gene and Paul, you're next. Well, maybe just Paul - Gene would probably sue me for drawing his likeness without his permission.

An Ounce of Professionalism


(previously published on FreelanceSwitch.com)

When you work in a creative field, certain assumptions are made about you. It's assumed that you listen to bands that no one has ever heard of (guilty), people are predisposed to believe that you'll eat strange foods (uh oh), and you're generally expected to look and behave like an "artiste" - dressing like you're from the future, not paying attention to schedules, being unresponsive to e-mails - that sort of thing. The image of the turn-of-the-last-century Parisian impressionist - complete with beret - is not wholly invalid here. I've seen it happen.

It didn't take me long to learn that even the slightest professional behavior - wearing an ironed shirt, preparing detailed outlines - even speaking clearly on the phone - has earned me points with clients. These things aren't exactly huge efforts - in fact, I once believed they were necessary to running a business - but apparently, not so.

It bugs the stuffin' out of me that the image of the aloof, carefree creative person still exists - but clearly, there are many of us out there helping to perpetuate that stereotype. "Ah, maybe he'll get to our urgently-needed website updates tomorrow - he probably got stuck at day two of Wizard World." Sheesh.

Clients have told me horror stories - designers took on their project, developed it 80% of the way to completion - then stopped answering e-mails and phone calls. What?! I even heard from one client that a prospective Flash developer said, on their first get-to-know-you phone call, "I'll call you back later - I have to take a [expletive deleted]." Come on, dude - you're messing it up for all of us!

But there's a benefit here - those low expectations can work to our advantage. It doesn't take much - timely responses to communications, well-designed business documents, sending source files before they're requested - to turn things around and impress clients. A little goes a long way.

Here's the flipside, though - I think there's a danger of looking too straight and clean when meeting with clients - especially clients working in an overly corporate environment. I think it's important to let a little of that creative edge leak through so clients see you as what you are - a "creative professional". Both words are equally important.

Love Is In The Air


I'm working on an illustration project for a bride-to-be. Not surprisingly, the piece is for her wedding invitation, and she specifically requested that she and her fiance be sitting atop the LOVE sculpture in Philadelphia, in their wedding attire. I certainly didn't mind such a specific request - it makes life easy, to be honest.

This is the final approved sketch - she had only change request after seeing the initial version. Her fiance's hand was grabbing her arm, and it came off looking a little rough. This slight modification actually brings it closer to a traditional wedding portrait pose - but go ahead and try to take your wedding photos on the LOVE sculpture. No, don't. You'll be arrested. I was just kidding.

full sketch:

The final vectorized piece of art will be posted here in a week or so, as soon as I can pull all those Bezier curves (designer/illustrator joke).

UPDATE:
I've made progress on the illustration, starting with the bride herself. Once I've finished rendering her and the groom, I'll show it to her to lock down the style before completing the illustration. Luckily, she provided me with three very consistent style samples before the project began, and this is the style she requested - flat colors (no gradients) and no outlines. This style usually goes faster (rendering outlines adds a lot of time to the rendering process) but it usually takes longer to tweak the colors, since the absence of outlines causes the shapes to intersect with each other. I don't want the colors to fight. That would be bad.


No, that's not some weird ram's horn or telephone in her right hand - it's an incomplete bouquet. Flowers will come next. Bouquets are nothing without flowers, I've learned.

UPDATE 2:
Received approval and positive feedback on the above portion of the bride, and moved forward. I've nearly fully rendered the groom, and gave the bride a few tweaks. Still not sure about that big piece of hair on the the side of her face. I'm working to keep the colors in the pinkish-magenta realm, so everything is harmonious.


UPDATE 3:
More progress on the background, and I'm getting happier with the color scheme. Trees and other landscaping next. I've kept the buildings loose and jazzy - straight lines but imperfect angles and alignment, to keep things loose and humanistic.